


Custom Graduation Caps with Tulip
Whether your grad is completing high school or college, this major milestone calls for major celebration! But first things first - the graduation ceremony! Wearing a cap and gown is tradition, but that doesn't mean you can't customize the grad cap so your grad stands out in the crowd. Creating something fun and memorable doesn't have to be complicated; DIYing a grad cap that looks fab is super easy with Tulip color products! Read on for the deets on two different customized caps using Tulip Fabric Markers and Paints.
What you need:
- Tulip Dimensional Paint (we used Black Slick and White Slick)
- Graduation cap
- Fabric
- Aleene's Quick Dry Fabric Fusion
- Freezer paper
- Iron
- World continents pattern (if desired)
- Cricut® machine or craft knife
- Ribbon
- Scissors
- Disposable paintbrush or foam brush
- Chalk pencil (optional)

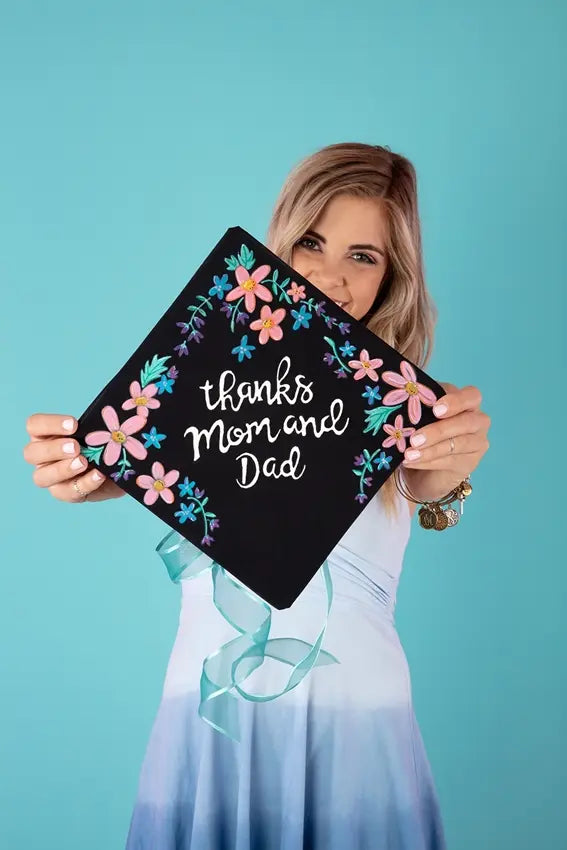
Thank You Graduation Cap
- Use a chalk pencil to trace around cap on fabric and cut out.
- Place fabric over the waxy side of a piece of freezer paper and iron in place to create a stable painting surface.
- Use Opaque Fabric Markers to draw and color in flowers or desired designs around fabric.
- If desired, first use chalk pencil to write your message on the center of fabric. Practice using White Slick Dimensional Paint on a paper towel and when ready, trace over/create wording on fabric. Let dry completely.
- Remove fabric from freezer paper backing. Use a disposable brush to brush a thin, even coat of Quick Dry Fabric Fusion over the top of cap.
- Smooth the fabric in place over the glue and let dry.
- Cut a length of ribbon, tie it into a bow and glue in place on the underside of cap.
Going Places Graduation Cap
- Use a chalk pencil to trace around cap on fabric and cut out.
- Place fabric over the waxy side of a piece of freezer paper and iron in place to create a stable painting surface.
- Using either a Cricut® cutting machine or a printed pattern and freezer paper, create a stencil of the world contintents. (If using freezer paper, trace over the pattern onto the non-wax side of freezer paper, then cut out designs with a craft knife. Iron waxy side down on top of fabric to hold in place.)
- Brush gold Glitter Paint onto fabric. Let dry and repeat until desired effect is achieved. Remove stencil and let dry completely.
- Use Black Slick Dimensional Paint to create wording, "Oh the places you'll go!" over the top of continents design. Let dry.
- Remove fabric from freezer paper backing. Use a disposable brush to brush a thin, even coat of Quick Dry Fabric Fusion over the top of cap.
- Smooth the fabric in place over the glue and let dry.

Your grad is ready to step into the future looking fab and ready for fun new adventures!